
Apple Crisp is a dessert that captures the essence of cozy family gatherings and autumn evenings. This amazing dish combines juicy apples with a crunchy, sweet topping, creating a delightful contrast that appeals to all ages. The warm, aromatic flavors of baked apples mixed with cinnamon and nutmeg evoke comforting memories and invite everyone to gather around the table. It’s a dessert that brightens any occasion, whether it’s a family dinner or a potluck gathering.
If you’ve never experienced a warm bowl of Apple Crisp topped with a scoop of vanilla ice cream, you’re in for a treat! The first spoonful is a heavenly blend of soft apples and a crispy oat topping. It’s a simple yet satisfying dessert that you’ll find yourself reaching for time and again. In this guide, we’ll explore why this recipe is special and how you can create it in your own kitchen. You’ll gain insights into the preparation process and tips on how to serve this delectable dish perfectly.
Not only does Apple Crisp shine in flavor, but its straightforward preparation makes it an ideal choice for novice cooks. You don’t need to be a baking expert to whip up this delightful dessert; with a few simple ingredients and steps, you can create a masterpiece that’s sure to impress. So, let’s dive deeper into what makes Apple Crisp a must-try dessert for everyone!
Why You’ll Love This Recipe
Apple Crisp is more than just a dessert; it’s an experience that brings warmth and satisfaction. Here are some compelling reasons why you’ll adore this recipe:
1. Simple Ingredients: The components are generally pantry staples, including apples, sugar, oats, and butter.
2. Customizable: Adjust the recipe to fit your preferences—add nuts, raisins, or even a hint of caramel for extra flavor.
3. Quick to Prepare: Spend less time in the kitchen with a recipe that requires minimal effort and achieves maximum results.
4. Perfect for All Seasons: While it’s particularly comforting in fall, Apple Crisp can be enjoyed year-round, using any type of apples.
5. Impressive Presentation: Serve in a beautiful dish to showcase the layers of apples and the golden topping, making it visually appealing.
6. Heartwarming Aroma: The smell of baked apples and spices fills your home, enticing everyone to gather around.
With these highlights, it’s clear to see why Apple Crisp has become a beloved staple at many celebrations and family get-togethers. Each bite is not only delicious but also evokes feelings of nostalgia and joy.
Preparation and Cooking Time
Creating your perfect Apple Crisp doesn’t take much time at all. Here’s a breakdown of the time you’ll need:
– Preparation Time: 15-20 minutes
– Cooking Time: 30-35 minutes
– Cooling Time: 10 minutes
Overall, you can enjoy this delightful treat on your table in under an hour! Expect to indulge in warm, gooey goodness shortly after you begin.
Ingredients
– 6 cups sliced apples (such as Granny Smith or Honeycrisp)
– 1 cup granulated sugar
– 1 tablespoon lemon juice
– 1 teaspoon ground cinnamon
– 1/4 teaspoon nutmeg
– 1 cup rolled oats
– 1 cup all-purpose flour
– 1/2 cup brown sugar, packed
– 1/2 cup unsalted butter, melted
– 1/4 teaspoon salt
Step-by-Step Instructions
Follow these easy steps to create your delicious Apple Crisp:
1. Preheat your oven to 350°F (175°C) and grease a 9×13-inch baking dish.
2. Prepare the Apples: In a large bowl, combine the sliced apples with lemon juice, granulated sugar, cinnamon, and nutmeg. Mix well and transfer to your prepared baking dish.
3. Make the Topping: In another bowl, combine the oats, flour, brown sugar, melted butter, and salt. Use a fork or your fingers to mix until crumbly.
4. Assemble the Crisp: Evenly spread the oat mixture over the apple filling in the baking dish.
5. Bake: Place the dish in the preheated oven and bake for about 30-35 minutes. The topping should be golden brown and the apples tender when done.
6. Cool: Allow the Apple Crisp to cool for about 10 minutes before serving. This will help set the filling slightly.
These straightforward steps will guide you in crafting an incredible Apple Crisp that is sure to impress your family and friends.
How to Serve
Serving Apple Crisp can be as delightful as making it. Here are some tips to make the experience memorable:
1. Presentation: Use a beautiful baking dish or portion individual servings in ramekins for an elegant touch.
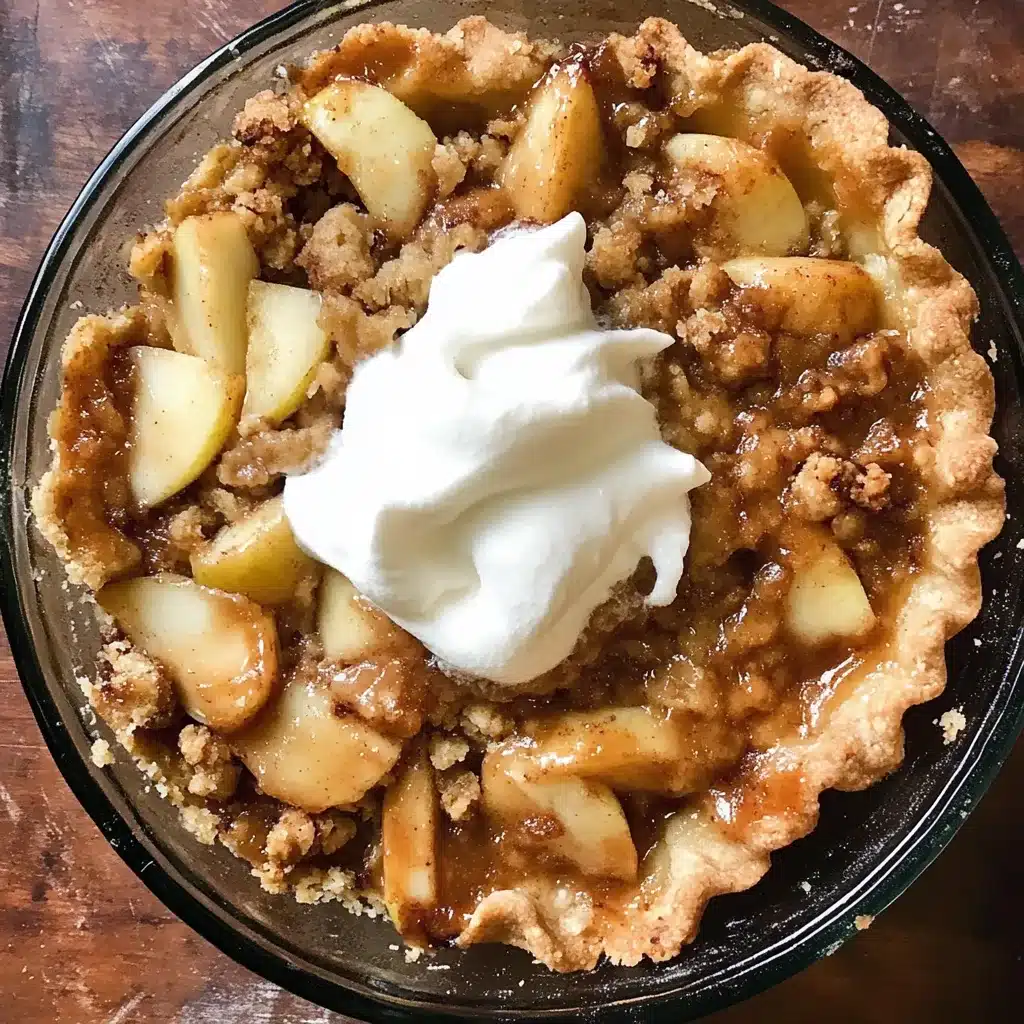
2. Toppings: Offer vanilla ice cream, whipped cream, or a drizzle of caramel sauce to elevate the dessert.
3. Portion Size: Serve generous portions, but not too large, to encourage guests to savor each bite and possibly go back for seconds!
4. Beverage Pairing: This dessert pairs wonderfully with coffee, tea, or even a dessert wine.
By following these serving tips, you’ll impress your guests and create a delightful atmosphere that complements the warmth of Apple Crisp. Enjoy and relish in the joy this recipe brings, making every occasion a special one!
Additional Tips
– Use Fresh Apples: Choose firm, tart apples like Granny Smith or Honeycrisp for the best flavor and texture.
– Experiment with Spices: Feel free to add ginger or cloves for an exciting twist to the classic cinnamon flavor.
– Serve Warm: Apple Crisp is best served warm from the oven, as it enhances the flavor and creates a delightful texture contrast with ice cream.
– Garnish: Sprinkle some chopped nuts on top of the oat mixture before baking for added crunch and flavor.
– Leftovers: If you have leftovers, reheat them slightly before serving to restore the crispness of the topping.
Recipe Variation
There are so many ways to put a twist on the traditional Apple Crisp. Consider trying these variations:
1. Berry Blend: Mix in blueberries or raspberries with the apples for added sweetness and a burst of color.
2. Caramel Apple Crisp: Drizzle caramel sauce over the apples before adding the topping for an indulgent treat.
3. Gluten-Free Version: Substitute the all-purpose flour with gluten-free flour or almond flour to make this dessert gluten-free.
4. Nutty Crisp: Add chopped walnuts or pecans into the topping for an extra layer of flavor and texture.
Freezing and Storage
Proper storage helps maintain the quality of your Apple Crisp:
– Refrigeration: Store leftover Apple Crisp in an airtight container in the fridge for 3-5 days.
– Freezing: You can freeze unbaked Apple Crisp for up to 3 months. Cover the baking dish tightly with plastic wrap and aluminum foil.
– Reheating: To enjoy frozen Apple Crisp, bake from frozen for an additional 10-15 minutes. If reheating leftovers, warm them in the oven to crisp the topping.
Special Equipment
To make your Apple Crisp, you will require the following tools:
– Mixing Bowls: Essential for combining your ingredients.
– Measuring Cups and Spoons: Accurate measurements are key to achieving the perfect balance of flavors.
– Baking Dish: A 9×13-inch baking dish is ideal for this recipe.
– Oven Mitts: Protect your hands while handling the hot dish post-baking.
– Serving Spoon: A sturdy spoon for portioning out your delicious Apple Crisp.
Frequently Asked Questions
Can I use other fruits in this recipe?
Yes! Pears, peaches, or even berries can be delicious alternatives or additions to the apple filling.
What should I do if I don’t have rolled oats?
You can substitute with quick oats or even crushed granola, but watch the baking time as they may cook more quickly.
Can I make this dessert dairy-free?
Absolutely! Replace butter with coconut oil or a dairy-free margarine.
Is it necessary to peel the apples?
Peeling is recommended for a smoother texture, but keeping the skins on will add fiber and a rustic touch.
Conclusion
Apple Crisp is truly a beloved dessert that encapsulates warmth and joy with every bite. Its simple preparation and delightful flavor make it a standout choice for any occasion. Whether you enjoy it at a festive gathering or as a comforting treat at home, Apple Crisp is sure to create cherished memories. Don’t hesitate to experiment with variations and tips that elevate this dish even further. Enjoy the process of making it, and savor all the smiles it brings to your table!

Apple Crisp: An Incredible Ultimate Recipe You’ll Love
- Total Time: 0 hours
Ingredients
– 6 cups sliced apples (such as Granny Smith or Honeycrisp)
– 1 cup granulated sugar
– 1 tablespoon lemon juice
– 1 teaspoon ground cinnamon
– 1/4 teaspoon nutmeg
– 1 cup rolled oats
– 1 cup all-purpose flour
– 1/2 cup brown sugar, packed
– 1/2 cup unsalted butter, melted
– 1/4 teaspoon salt
Instructions
Follow these easy steps to create your delicious Apple Crisp:
1. Preheat your oven to 350°F (175°C) and grease a 9×13-inch baking dish.
2. Prepare the Apples: In a large bowl, combine the sliced apples with lemon juice, granulated sugar, cinnamon, and nutmeg. Mix well and transfer to your prepared baking dish.
3. Make the Topping: In another bowl, combine the oats, flour, brown sugar, melted butter, and salt. Use a fork or your fingers to mix until crumbly.
4. Assemble the Crisp: Evenly spread the oat mixture over the apple filling in the baking dish.
5. Bake: Place the dish in the preheated oven and bake for about 30-35 minutes. The topping should be golden brown and the apples tender when done.
6. Cool: Allow the Apple Crisp to cool for about 10 minutes before serving. This will help set the filling slightly.
These straightforward steps will guide you in crafting an incredible Apple Crisp that is sure to impress your family and friends.
- Prep Time: 15 minutes
- Cook Time: 30-35 minutes
Nutrition
- Serving Size: 8 servings
- Calories: 250 kcal
- Fat: 10g
- Protein: 3g