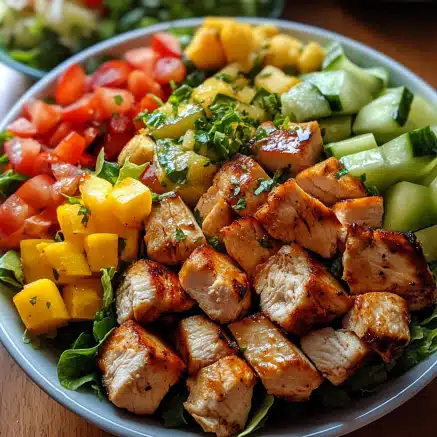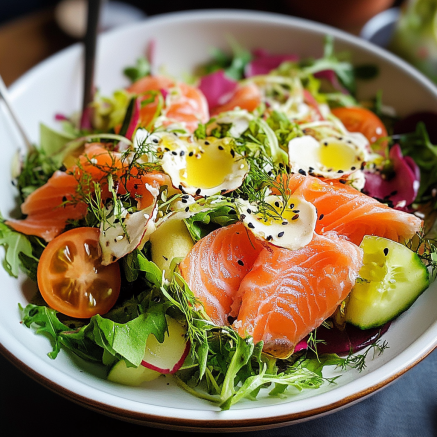

Sushi Cups are a fun and creative twist on classic sushi. This innovative approach to one of the most beloved Japanese dishes transforms traditional flavors into delightful mini portions that are perfect for any occasion. Whether you’re hosting a dinner party, planning a casual get-together, or looking for a unique appetizer for a special event, Sushi Cups are sure to impress your guests. Each cup bursts with flavor, providing a fantastic symphony of textures that reflects the art of sushi-making while being incredibly easy to prepare.
The beauty of Sushi Cups lies in their versatility. You can customize them to suit everyone’s taste, making this a fantastic option for mixed gatherings. Kids and adults alike will love these bite-sized delights! With a range of fillings and toppings, you can explore various flavor combinations—from fresh seafood to vegetables and creamy sauces. Plus, the stunning presentation adds a special touch that elevates any dining experience.
In this guide, you’ll discover why Sushi Cups are a must-try, how to make them step by step, and tips on serving and pairing them for the ultimate experience. Get ready to dive into the exciting world of Sushi Cups and impress everyone at your next meal without breaking a sweat.
Why You’ll Love This Recipe
Sushi Cups offer plenty of delightful aspects that will make you come back for more. Here are some reasons why you’ll fall in love with this recipe:
1. Unique Presentation: Unlike traditional sushi rolls, the individual cups make for an eye-catching display.
2. Customizable Options: You can easily adjust fillings and toppings to cater to varying palates and dietary preferences.
3. Easy to Prepare: With straightforward steps, you can make these cups quickly, even if you’re not an experienced cook.
4. Great for Any Event: Perfect as an appetizer, a side dish, or even a main course, Sushi Cups are versatile for any gathering—be it casual or formal.
5. Fun for Everyone: These cups can be enjoyed by all ages, making them a wonderful treat for family meals or parties with kids.
6. Flavor-Packed Bites: Each cup is packed with delicious ingredients that provide a burst of flavor in every bite.
With these many features, it’s no wonder why Sushi Cups are gaining popularity as a fun and delicious alternative to traditional sushi.
Preparation and Cooking Time
The total time required for making Sushi Cups is approximately 1 hour, which includes preparation, cooking, and assembly. Here’s a detailed breakdown:
– Preparation Time: 30 minutes
– Cooking Time: 20 minutes
– Assembly Time: 10 minutes
This timeframe may vary depending on your cooking experience, but it should serve as a useful guide to plan your sushi-making session.
Ingredients
– 1 cup sushi rice
– 1 ¼ cups water
– 2 tablespoons rice vinegar
– 1 tablespoon sugar
– ½ teaspoon salt
– 1 lb. fresh sashimi-grade fish (e.g., tuna, salmon)
– 1 avocado, sliced
– 1 small cucumber, julienned
– ¼ cup mayonnaise (preferably Kewpie)
– 1 tablespoon sriracha (optional)
– 1 tablespoon toasted sesame seeds
– Nori sheets, cut into small rounds or squares
– Microgreens or sprouts for garnish (optional)
– Soy sauce for serving
Step-by-Step Instructions
To make Sushi Cups, follow these easy steps:
1. Rinse Sushi Rice: Place the sushi rice in a fine-mesh strainer and rinse under cold water until the water runs clear.
2. Cook Rice: In a medium saucepan, add the rinsed sushi rice and water. Bring to a boil, then reduce the heat to low, cover, and simmer for 20 minutes. Remove from heat and let it sit, covered, for an additional 10 minutes.
3. Season Rice: In a small bowl, mix the rice vinegar, sugar, and salt until dissolved. Once the rice is cooked, transfer it to a large bowl and gently fold in the vinegar mixture. Allow it to cool slightly.
4. Prepare Fillings: While the rice is cooling, slice the sashimi-grade fish into small cubes or strips. Prepare cucumber and avocado slices.
5. Assemble Cups: Line a muffin tin with the nori sheets, creating small cups. Spoon a layer of sushi rice into each cup, pressing gently to form a base.
6. Add Fillings: Top each rice layer with fish, cucumber, and avocado slices.
7. Prepare Sauce: In a small bowl, mix mayonnaise and sriracha to create a spicy mayo (adjust spice to taste). Drizzle this sauce generously over the toppings in each cup.
8. Garnish: Sprinkle toasted sesame seeds and add microgreens or sprouts on top for presentation.
9. Chill (Optional): Place the assembled cups in the refrigerator for about 10 minutes before serving to slightly chill.
10. Serve: Remove the cups from the muffin tin and enjoy these delightful bites with soy sauce on the side.
How to Serve
When serving Sushi Cups, take note of the following tips to enhance the experience:
1. Plating: Arrange the cups on a beautiful serving platter, showcasing their vibrant colors and textures.
2. Dipping Sauces: Offer soy sauce and additional spicy mayo or wasabi on the side for guests to customize their flavors.
3. Garnish: Add extra toppings like pickled ginger or wasabi for those who enjoy bold flavors.
4. Pairing Drinks: Serve with light beverages like green tea, sake, or sparkling water to complement the flavors.
5. Portions: Keep portions small to encourage guests to try multiple cups or return for seconds.
By considering these serving suggestions, you not only elevate the presentation but also enhance the overall dining experience for your guests. Get ready for an unforgettable feast with these amazing Sushi Cups!
Additional Tips
– Use Fresh Ingredients: To achieve the best flavor, always choose high-quality, fresh ingredients. Fresh fish and ripe avocado make a significant difference in taste.
– Experiment with Toppings: Don’t hesitate to get creative with toppings. Consider adding elements like tobiko, pickled vegetables, or even a sprinkle of chili flakes for an extra kick.
– Consider Dietary Restrictions: If you have guests with dietary restrictions, you can replace fish with tofu, cooked shrimp, or even roasted vegetables in the Sushi Cups.
Recipe Variation
Feel free to explore different flavor profiles! Here are a few variations to try:
1. Vegetarian Option: Replace sashimi-grade fish with a combination of colorful sautéed vegetables such as bell peppers, zucchini, and carrots.
2. Spicy Tuna Cups: Mix diced tuna with spicy mayo and avocado for an extra kick, and use a drizzle of chili oil on top.
3. Tropical Twist: Incorporate mango and pineapple with shrimp for a refreshing tropical flavor. Add coconut flakes for a fun texture.
Freezing and Storage
– Storage: Keep any leftover Sushi Cups in an airtight container in the refrigerator. They should be consumed within 2-3 days for the best flavor and texture.
– Freezing: While it’s best to enjoy Sushi Cups fresh, you can freeze the base (rice and nori) without the fillings. Assemble the cups just before serving for optimal taste.
Special Equipment
You will need a few essential tools to prepare these Sushi Cups successfully:
– Muffin tin to shape the cups.
– Fine-mesh strainer for rinsing sushi rice.
– Medium saucepan for cooking rice.
– Mixing bowls for preparing toppings and sauces.
– Sharp knife for slicing fish and vegetables.
Frequently Asked Questions
Can I make Sushi Cups ahead of time?
Yes, you can prepare the rice and fillings in advance. Assemble the cups just before serving to maintain their crispness.
What type of fish is best for Sushi Cups?
Fresh sashimi-grade fish like tuna or salmon is ideal. However, feel free to experiment with cooked or plant-based options.
Can I use regular rice instead of sushi rice?
While regular rice can be used, sushi rice has the perfect starch content for the desired sticky texture. Therefore, it’s recommended for preparing Sushi Cups.
How spicy are these cups?
The spiciness can easily be adjusted. Use more or less sriracha in the mayo according to your taste preference.
Are Sushi Cups gluten-free?
Yes, as long as you use gluten-free soy sauce (or tamari), Sushi Cups can be made gluten-free. Just ensure that all other ingredients are also gluten-free.
Conclusion
Sushi Cups: A Fun and Creative Twist on Classic Sushi brings a world of flavor and creativity to your dining table. These bite-sized treats are not only visually appealing but also offer a delightful culinary experience. Their versatility, ease of preparation, and potential for personalization make them a must-try for any occasion. Whether you’re serving them at a family gathering or an elegant party, Sushi Cups are bound to impress everyone. Get ready to enjoy these delicious morsels and explore the endless possibilities they have to offer!

Sushi Cups: An Amazing Ultimate Recipe for 5-Star Entertaining
- Total Time: 35 minutes
Ingredients
– 1 cup sushi rice
– 1 ¼ cups water
– 2 tablespoons rice vinegar
– 1 tablespoon sugar
– ½ teaspoon salt
– 1 lb. fresh sashimi-grade fish (e.g., tuna, salmon)
– 1 avocado, sliced
– 1 small cucumber, julienned
– ¼ cup mayonnaise (preferably Kewpie)
– 1 tablespoon sriracha (optional)
– 1 tablespoon toasted sesame seeds
– Nori sheets, cut into small rounds or squares
– Microgreens or sprouts for garnish (optional)
– Soy sauce for serving
Instructions
To make Sushi Cups, follow these easy steps:
1. Rinse Sushi Rice: Place the sushi rice in a fine-mesh strainer and rinse under cold water until the water runs clear.
2. Cook Rice: In a medium saucepan, add the rinsed sushi rice and water. Bring to a boil, then reduce the heat to low, cover, and simmer for 20 minutes. Remove from heat and let it sit, covered, for an additional 10 minutes.
3. Season Rice: In a small bowl, mix the rice vinegar, sugar, and salt until dissolved. Once the rice is cooked, transfer it to a large bowl and gently fold in the vinegar mixture. Allow it to cool slightly.
4. Prepare Fillings: While the rice is cooling, slice the sashimi-grade fish into small cubes or strips. Prepare cucumber and avocado slices.
5. Assemble Cups: Line a muffin tin with the nori sheets, creating small cups. Spoon a layer of sushi rice into each cup, pressing gently to form a base.
6. Add Fillings: Top each rice layer with fish, cucumber, and avocado slices.
7. Prepare Sauce: In a small bowl, mix mayonnaise and sriracha to create a spicy mayo (adjust spice to taste). Drizzle this sauce generously over the toppings in each cup.
8. Garnish: Sprinkle toasted sesame seeds and add microgreens or sprouts on top for presentation.
9. Chill (Optional): Place the assembled cups in the refrigerator for about 10 minutes before serving to slightly chill.
10. Serve: Remove the cups from the muffin tin and enjoy these delightful bites with soy sauce on the side.
- Prep Time: 15 minutes
- Cook Time: 20 minutes
Nutrition
- Serving Size: 12 cups
- Calories: 250 kcal
- Fat: 12g
- Protein: 8g