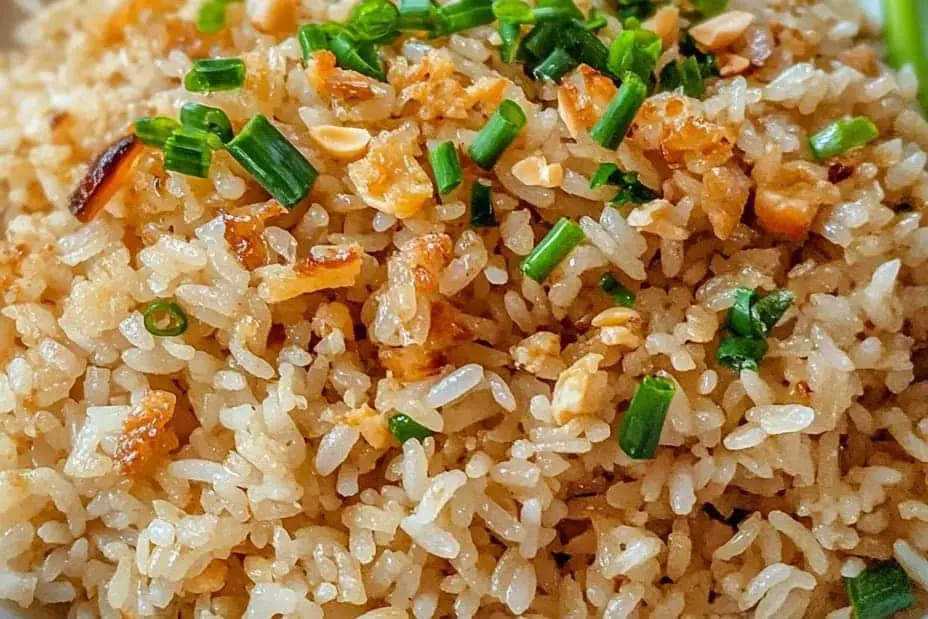
Sinangag, the ultimate Filipino garlic fried rice, is a wonderful staple that can elevate any meal. This dish is not just a side; it’s a celebration of flavors that showcases the versatility of rice, particularly when combined with the aromatic allure of garlic. For many Filipinos, Sinangag is a beloved breakfast choice, a comforting reminder of home that pairs beautifully with eggs, fried meats, and savory dishes. Whether you’re enjoying it as a hearty breakfast or a satisfying dinner accompaniment, Sinangag truly delivers an incredible culinary experience.
This garlic fried rice brings together simple yet impactful ingredients to provide a burst of flavor in every bite. The combination of warm, fluffy rice, crispy garlic, and a sprinkle of salt makes it unforgettable. If you’re ready to experience the delightful taste of this traditional dish, this article will guide you through its preparation, cooking techniques, and serving ideas. Whether you’re a culinary novice or a pro, Sinangag offers an amazing opportunity to impress yourself and your loved ones.
Not only is this recipe simple to follow, but it also allows for creativity. You can customize it with additional ingredients like veggies or protein. Therefore, you’ll find that Sinangag is an essential dish to have in your cooking repertoire. Let’s dive into why this recipe stands out and what you need to make your Sinangag the best it can be.
Why You’ll Love This Recipe
Sinangag is more than just fried rice; it’s a dish that brings people together. Here are a few reasons why this recipe is a must-try:
1. Flavor Explosion: The infusion of garlic ensures an incredible taste that awakens the palate.
2. Versatile Base: It pairs well with a variety of dishes, from meats to vegetables.
3. Quick and Easy: With minimal preparation, it is perfect for busy mornings or last-minute dinners.
4. Customizable: Feel free to add your favorite protein or veggies to enhance it further.
5. Comfort Food: Sinangag offers a nostalgic connection to home cooking for many, making it heartwarming.
6. Kid-Friendly: Children generally love this dish, making it an excellent choice for family meals.
These factors make Sinangag an unforgettable dish that you and your family will likely come to love.
Preparation and Cooking Time
Making Sinangag is not only simple but also quick. Here’s what you can expect in terms of time:
– Preparation Time: 10 minutes
– Cooking Time: 15 minutes
– Total Time: 25 minutes
This quick turnaround makes it ideal for breakfast or as a mighty side dish for various meals.
Ingredients
– 4 cups of cooked white rice (preferably day-old)
– 5-6 cloves of garlic, minced
– 2 tablespoons vegetable oil
– 1 teaspoon salt (adjust to taste)
– Freshly ground black pepper, to taste
– Chopped green onions, for garnish (optional)
Step-by-Step Instructions
Creating amazing Sinangag is easy with these step-by-step instructions:
1. Heat the Oil: In a large skillet or wok, add the vegetable oil over medium heat.
2. Sauté the Garlic: Once the oil is hot, add the minced garlic and cook until golden brown, about 2-3 minutes. Be careful not to burn it, as burnt garlic will have a bitter taste.
3. Add the Rice: Add the cooked rice to the skillet, breaking up any clumps with a spatula.
4. Mix Thoroughly: Stir the rice and garlic together, ensuring even distribution of the garlic throughout the rice.
5. Season: Sprinkle salt and freshly ground black pepper over the rice. Stir and taste, adjusting the seasoning if necessary.
6. Fry: Continue to cook the mixture for another 5-7 minutes until the rice is heated through and slightly crispy. Stir occasionally to prevent sticking.
7. Garnish: Remove from heat and garnish with chopped green onions for an added burst of flavor and color.
These steps will take you to the perfect bowl of Sinangag, letting the fabulous aroma of garlic fill your kitchen!
How to Serve
Serving Sinangag can enhance the overall dining experience. Here are some ideas to help you present this dish beautifully:
1. Plating: Serve the Sinangag on a large platter, making it look inviting and ready to share.
2. Accompaniments: Consider offering it alongside crispy fried eggs, tocino (sweet pork), longganisa (Filipino sausage), or even a savory stir-fry.
3. Finishing Touch: Drizzle with soy sauce or sprinkle a little additional salt for those who prefer more flavor.
4. Garnish: A sprinkle of fried garlic or green onions on top makes for a colorful presentation.
5. Family Style: Place the platter in the center of the table, allowing everyone to serve themselves, which creates a more communal atmosphere.
With these serving tips, Sinangag will not only taste great but also look appealing on your dining table, perfect for gathering friends and family alike.
Additional Tips
– Use Day-Old Rice: For the best texture, use rice that has been cooked at least a day before. It will fry better and not become mushy.
– Control Garlic Flavor: Adjust the amount of garlic based on your preference. More garlic yields a stronger flavor, while less will offer a milder taste.
– Experiment with Seasonings: Besides salt and pepper, feel free to add other spices like paprika, or even soy sauce, for a different flavor dimension.
– Keep the Heat Moderate: Always cook on medium heat. This prevents the garlic from burning and the rice from sticking.
– Taste as You Go: Season gradually and taste your Sinangag as you mix and fry for the perfect flavor balance.
Recipe Variation
Add your twist! Here are some exciting variations to consider:
1. Vegetable Sinangag: Toss in some diced vegetables like peas, carrots, or bell peppers to make it more nutritious.
2. Protein-Packed Sinangag: Stir in cooked chicken, shrimp, or tofu for a heartier dish. This turns Sinangag into a one-pan meal!
3. Spicy Sinangag: Add sliced chili peppers or a dash of chili flakes to give it some heat.
4. Cheesy Sinangag: For a creamy twist, sprinkle shredded cheese while frying.
Freezing and Storage
– Storage: Keep any leftover Sinangag in an airtight container in the refrigerator. It should stay fresh for 3-4 days.
– Freezing: You can freeze Sinangag for up to a month. Portion it into freezer bags or containers, ensuring to remove excess air before sealing to prevent freezer burn.
Special Equipment
Having the right tools can enhance your cooking experience. Here are a few essentials for making Sinangag:
– Large Skillet or Wok: To enable even frying of the rice and garlic.
– Spatula: For stirring and breaking up the rice easily without damaging it.
– Measuring Spoons: To ensure precision in ingredient quantities.
Frequently Asked Questions
Can I use brown rice instead of white rice?
Yes, brown rice can be used, but it may require longer cooking time and may change the dish’s flavor profile.
Is Sinangag suitable for meal prep?
Absolutely! It’s perfect for meal prep as it can be made in bulk and stored for future meals.
How can I make Sinangag vegan?
This dish is naturally vegan! Just ensure that the vegetable oil used is plant-based.
What can I serve with Sinangag?
It pairs beautifully with many dishes, such as grilled meats, eggs, or even as a base for a stir-fry.
Is Sinangag gluten-free?
Yes, as long as you use gluten-free soy sauce if you choose to include it.
Conclusion
Sinangag is not just a side dish; it’s a culinary gem that allows for creativity and personalization. Its straightforward preparation, delightful garlic flavor, and versatile nature make it a favorite in Filipino households. With this guide, you can make Sinangag that will evoke memories of home-cooked meals and warm gatherings. Embrace the simplicity and flavor this garlic fried rice offers and let it become a regular in your kitchen repertoire.

Sinangag: The Ultimate Filipino Garlic Fried Rice Recipe
- Total Time: 25 minutes
Ingredients
– 4 cups of cooked white rice (preferably day-old)
– 5-6 cloves of garlic, minced
– 2 tablespoons vegetable oil
– 1 teaspoon salt (adjust to taste)
– Freshly ground black pepper, to taste
– Chopped green onions, for garnish (optional)
Instructions
Creating amazing Sinangag is easy with these step-by-step instructions:
1. Heat the Oil: In a large skillet or wok, add the vegetable oil over medium heat.
2. Sauté the Garlic: Once the oil is hot, add the minced garlic and cook until golden brown, about 2-3 minutes. Be careful not to burn it, as burnt garlic will have a bitter taste.
3. Add the Rice: Add the cooked rice to the skillet, breaking up any clumps with a spatula.
4. Mix Thoroughly: Stir the rice and garlic together, ensuring even distribution of the garlic throughout the rice.
5. Season: Sprinkle salt and freshly ground black pepper over the rice. Stir and taste, adjusting the seasoning if necessary.
6. Fry: Continue to cook the mixture for another 5-7 minutes until the rice is heated through and slightly crispy. Stir occasionally to prevent sticking.
7. Garnish: Remove from heat and garnish with chopped green onions for an added burst of flavor and color.
These steps will take you to the perfect bowl of Sinangag, letting the fabulous aroma of garlic fill your kitchen!
- Prep Time: 10 minutes
- Cook Time: 15 minutes
Nutrition
- Serving Size: 4 servings
- Calories: 300 kcal
- Fat: 7g
- Protein: 6g